
Have you ever stared at an old, rusted metal chair or a vintage lamp covered in layers of peeling paint and thought, “This could look stunning if only I could remove the paint?” Whether you’re restoring antique treasures, revamping outdoor furniture, or simply prepping metal for a fresh coat of paint, using a paint stripper is a game-changer.
This blog will teach you how to use paint stripper effectively and ensure you avoid common mistakes, stay safe, and get professional-level results. Let’s turn those layers of paint into a clean, bare surface that’s ready for a brand-new look.
What is a Paint Stripper and Why Use It on Metal?
A paint stripper is a chemical solution designed to break down layers of paint, varnish, or other coatings, making them easy to scrape off. While sandpaper and heat guns are alternative methods, chemical strippers are often the safest choice for intricate metal surfaces or when you want to preserve delicate details.
Benefits of Using a Paint Stripper on Metal:
- Preserves Details: Ideal for ornate or delicate designs, such as those found on antique fixtures.
- Efficient on Multiple Layers: Works effectively on surfaces with multiple layers of paint.
- Minimizes Damage: Reduces the risk of scratching or warping the metal compared to mechanical methods.
Types of Paint Strippers
1. Solvent-Based Paint Strippers
- Features: Contain strong chemicals like methylene chloride that dissolve paint quickly.
- Best For: Thick, stubborn layers of oil-based paint.
- Caution: Requires excellent ventilation due to strong fumes.
2. Caustic-Based Paint Strippers
- Features: Contain alkaline compounds like lye to break down paint.
- Best For: Tough coatings on sturdy metal.
- Caution: Can corrode certain metals if not neutralized promptly.
3. Biochemical or Eco-Friendly Paint Strippers
- Features: Made from natural ingredients like plant-derived solvents.
- Best For: Indoor use and environmentally conscious projects.
- Caution: May take longer to work than chemical strippers.
Tips to Safely Use Paint Stripper on Metal
Safety and preparation are crucial when working with paint strippers. Here’s a professional step-by-step process to achieve the best results:
Step 1: Gather Your Supplies
- Paint Stripper: Select a product suitable for metal (e.g., solvent-based for tough jobs or eco-friendly for indoor use).
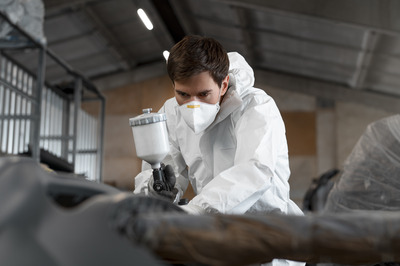
- Protective Gear: Wear chemical-resistant gloves, safety goggles, a respirator, and long sleeves.
- Scraping Tools: Use a plastic or metal scraper, depending on the delicacy of the surface.
- Drop Cloth or Workbench: Protect the area with a disposable covering.
Step 2: Prepare the Surface
- Clean the metal thoroughly to remove grease, dirt, or loose debris.
- For delicate surfaces, test the stripper on a small, inconspicuous area to ensure compatibility.

Step 3: Apply the Paint Stripper
- Use a natural-bristle brush or sponge to apply an even, generous layer of the stripper.
- Work in manageable sections to maintain control.
- For solvent-based strippers, consider covering the area with plastic wrap to prevent the product from drying out too quickly.
Step 4: Allow Dwell Time
- Read the manufacturer’s instructions for recommended waiting time (typically 15–60 minutes).
- During this time, the paint will start to bubble, crack, or wrinkle, indicating it’s ready to be removed.
Step 5: Remove the Paint
- Use a scraper to gently lift off the softened paint.
- For hard-to-reach crevices or intricate details, use a wire brush, toothbrush, or steel wool.
- Avoid aggressive scraping that could damage the metal underneath.
Step 6: Neutralize the Stripper (If Required)
- Some caustic or solvent-based strippers require neutralization with water or a specific neutralizing agent.
- Wipe down the surface with a clean rag to remove any residue.
Step 7: Rinse and Dry
- Thoroughly rinse the metal with water to eliminate any remaining chemical traces.
- Pat dry with a clean cloth and allow the surface to air dry completely before further treatment.
Other Effective Ways to Remove Paint from Metal
While paint strippers are highly effective, you might consider these alternatives for specific scenarios:
- Heat Guns: Soften the paint for easier scraping but can warp thin metal if over-applied.
- Sanding: Use fine-grit sandpaper for smaller jobs, though it can scratch delicate surfaces.
- Media Blasting: Ideal for large-scale industrial projects but requires professional equipment.
Common Mistakes to Avoid for a Flawless Finish
Even with the best tools and products, mistakes can happen. Avoid these pitfalls:
- Skipping Safety Gear: Chemical burns or inhalation risks can be severe. Always wear proper protection.
- Over-Scraping: Aggressive scraping can damage the underlying metal, especially soft materials like aluminum.
- Ignoring Dwell Time: Rushing the process reduces effectiveness, requiring repeat applications.
Eco-Friendly Tips for Safe Disposal and Cleanup
Paint stripper chemicals, especially solvent-based ones, can harm the environment if not disposed of properly. Follow these tips:
- Collect paint chips and used strippers in a sealed container.
- Dispose of them according to your local hazardous waste guidelines.
- Opt for eco-friendly strippers whenever possible for a safer, greener approach.
How to Select the Perfect Paint Stripper for Your Project
Looking for the best product for your next project? Check out this paint stripper for a solution that combines efficiency and safety. From heavy-duty industrial projects to delicate home restorations, you’ll find a wide range of options tailored to your needs.
Your Restoration Awaits!
Transforming a painted metal surface into a pristine, ready-to-use masterpiece isn’t as daunting as it seems. With the right tools, techniques, and a bit of patience, you can achieve professional results every time. Ready to strip away the old and bring out the beauty of your metal surfaces?
Go ahead—your next restoration project is calling!